Chimney Removal
Why Chimney Removal Matters
Chimney removal often exceeds simple demolition. Chimneys can crack, lean, or leak, creating safety hazards and structural risks. Therefore, many building owners choose removal to protect walls, roofs, and people. Meanwhile, others remove chimneys to gain headroom or update their home’s design.
Common Reasons for Chimney Removal
Structural Issues
Old chimneys may crack or tilt over time. Because unchecked damage can spread to walls and roofs, removal often prevents costly repairs later.
Changes in Building Use
When a home converts to an office or retail space, the chimney may no longer serve a purpose. Removing it clears valuable overhead space and simplifies interior layouts.
Safety Concerns
Loose flue bricks or crumbling mortar can fall and injure people below. Consequently, removing a hazardous chimney stops debris—and liability—before it starts.
Aesthetic Updates
Finally, some owners find an old chimney clashes with a new style. In that case, removal refreshes curb appeal and aligns with modern design goals.
The Chimney Removal Process
-
Planning & Permits
- A professional inspects the chimney’s condition and location.
- Next, they secure any required local permits for demolition.
-
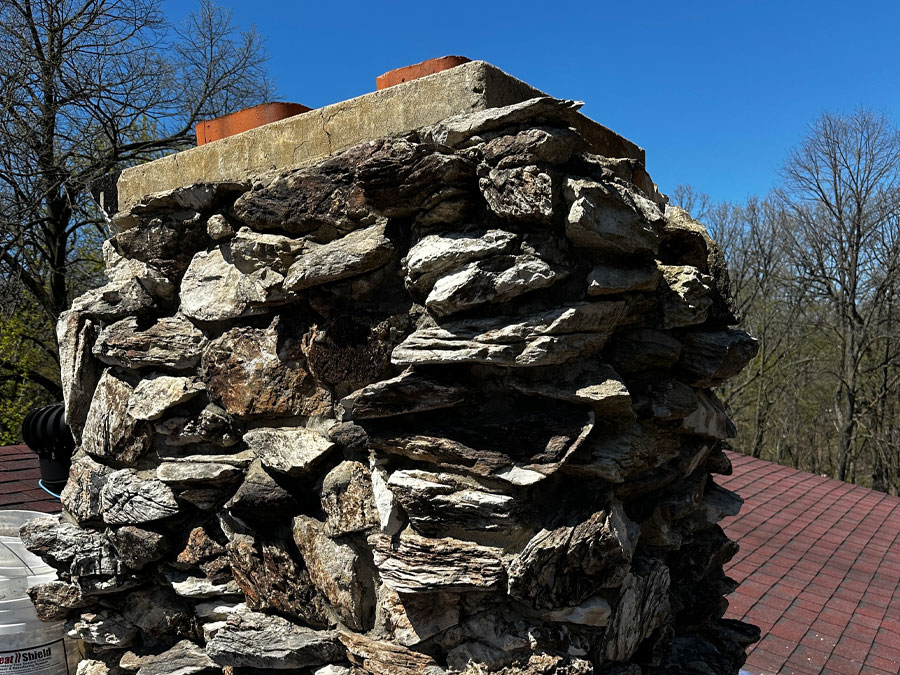
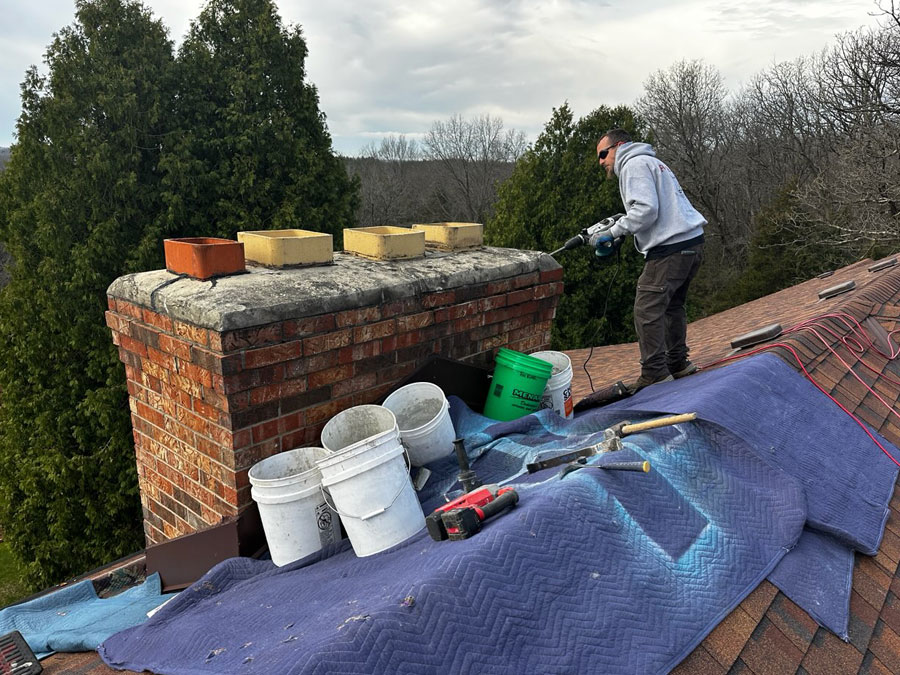
Safe Upper Removal
- Masons work from the roof up, stripping bricks in layers.
- This method prevents loose masonry from falling inside.
-
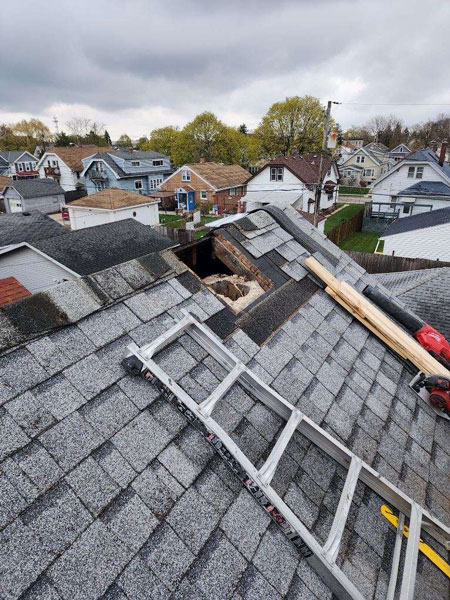
Lower Section Demolition
- Crews dismantle the remaining shaft.
- Meanwhile, they protect floors and walls with drop cloths.
-
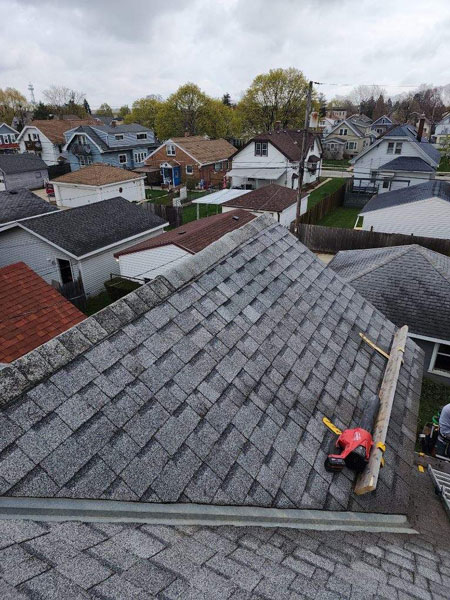
Roof Repair & Sealing
- Workers patch the roof hole with mortar or new shingles.
- Finally, they seal the old flue opening to block rain and pests.
Cost & Time Factors
- Chimney Size: Taller or wider stacks need more labor.
- Material Type: Special stone or brick can require unique tools.
- Access Needs: Scaffolding adds permit and setup costs.
However, removal often costs less than ongoing patchwork or leak-related insurance claims.
Aftercare & Maintenance
- Inspect roof seals each year to stop water leaks.
- Check the attic for drafts or stray debris.
- Reapply a weatherproof coating around patched areas every few years.
By investing in aftercare, you extend your building’s envelope and avoid future repairs.
Key Takeaways
- Safety & Structure: Removal stops damage and injury risks.
- Space & Style: It frees headroom and updates curb appeal.
- Clear Process: From permits to sealing, each step ensures a safe job.
- Smart Investment: Aftercare keeps your home dry and protected.
Whether you need more space, a safer roofline, or a fresh look, chimney removal offers a smart, long-term solution.
financing


A professional should remove a chimney
Why Proper Chimney Removal Matters
Chimney removal starts with a clear plan and a skilled team. Because a chimney links to your roof and walls, taking it down incorrectly can lead to leaks or damage. Therefore, you should follow each step carefully and hire a professional.
1. Inspection and Planning
Before work begins, a contractor checks the chimney’s condition, type, and location. Then, they decide on permits and tools needed. As a result, you know the cost and timeline before any bricks come down.
2. Site Preparation
Next, workers clear furniture and obstacles around the chimney. Meanwhile, they cover floors and walls with protective sheets. This step keeps your home clean and safe throughout the project.
3. Scaffolding Setup
Because chimney tops sit above the roof line, a sturdy scaffold is essential. Workers assemble it around the chimney to reach every brick. Consequently, they avoid slips and ensure stable footing.
4. Brick-by-Brick Dismantling
The team removes bricks from the top down, one layer at a time. They bag or sweep up debris between each layer. In addition, they sort salvageable bricks for reuse or recycling.
5. Roof Repair and Sealing
After the chimney shaft is gone, the crew patches the roof opening. They install new flashing and apply weather-proof sealant. Therefore, your roof stays watertight and durable.
6. Final Clean-Up
Finally, workers haul away all debris and remove the scaffold. Then, they sweep and vacuum the work area. As a result, your home returns to normal without leftover mess.
Conclusion
Chimney removal protects your home’s structure and safety. By following these six steps under a pro’s care, you avoid leaks, drafts, and damage. If you need chimney removal, consult a certified contractor today.
Honest, Affordable & Experienced
When it comes to home improvements, you want a team that’s honest, affordable, and experienced. That’s why so many people choose us.
Because we care about your home, we do the job right from the start. Whether it’s a small fix or a big repair, we show up on time, work hard, and clean up after.
The Clear Choice for your home improvement needs.
What Fox River Clients Are Saying